Advanced options in Pentaho JPivot crosstab
In the next Pentaho tutorial lessons we will add a few more sophisticated options to the JPivot crosstab created in the previous lesson.
The enhancements will include adding such options as sorting, crosstab navigation, MDX editing, slice & dice, charts, exporting and design changes.
First feature to add will be a JPivot navigator with a menu toolbar
JPivot Navigator
JPivot Navigator is a JPivot component which allows:
To attach a Navigator with a menu toolbar to the JPivot crosstab add the following lines to the definition file:
	<!-- navigator definition -->
	<jp:navigator id="navi01" query="#{query01}" visible="true"/>

	<!-- render navigator -->
	<wcf:render ref="navi01" xslUri="/WEB-INF/jpivot/navi/navigator.xsl" xslCache="false"/>

	<!-- Define and render the toolbar to show the components -->
	<wcf:toolbar id="toolbar01" bundle="com.tonbeller.jpivot.toolbar.resources">
	<wcf:scriptbutton id="cubeNaviButton" tooltip="toolb.cube"
		img="cube" model="#{navi01.visible}"/>
	</wcf:toolbar>
	<wcf:render ref="toolbar01" xslUri="/WEB-INF/jpivot/toolbar/htoolbar.xsl" xslCache="false"/>
To make a jpivot navigator component visible on the crosstab area, it's necessary to create a toolbar. A toolbar is a set of buttons created with the wcf:toolbar jsp tag. It can be customized by editing the htoolbar.xsl configuration file.
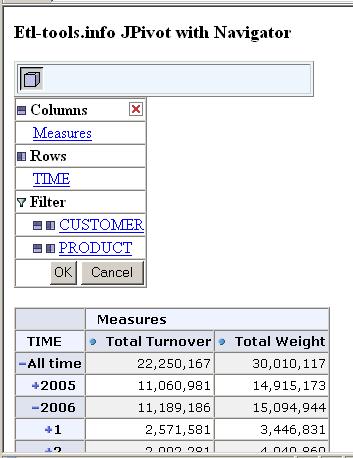
Please refer to the pictures below to see how the JPivot navigator works and how does it look like. The standard icon for the navigator is a 3-D cube and it's attached to a toolbar (the one-row light blue table at the top).
The JPivot navigator object is located between the toolbar and the pivot table:


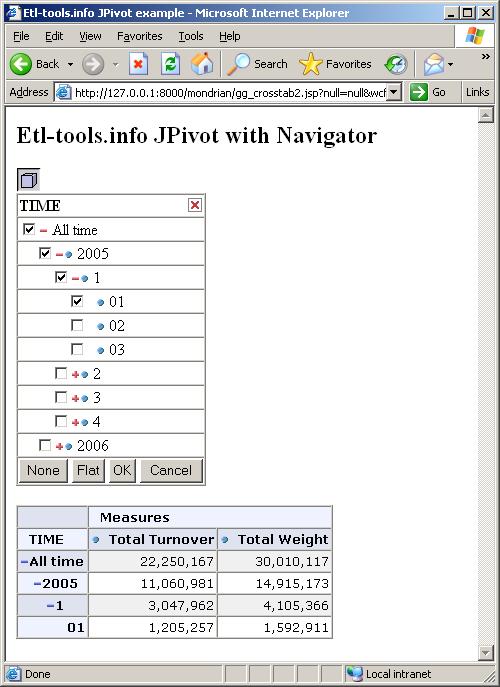
The data can be filtered out using the JPivot navigator this way:


Adding a slicer
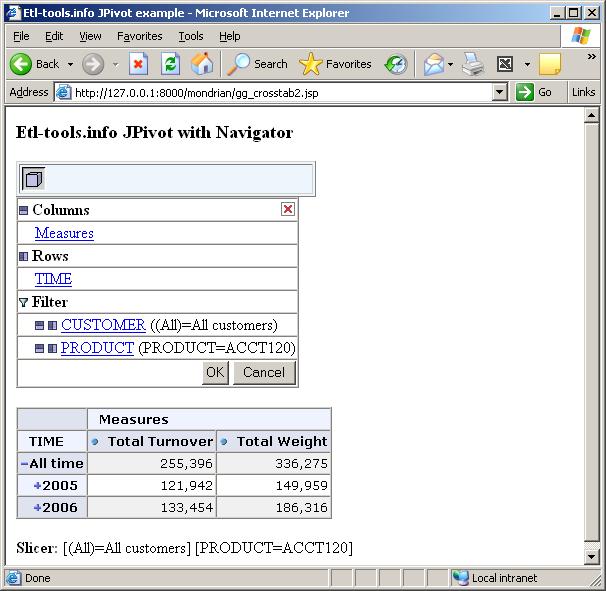
The Slicer of the cube is a very useful informational JPivot component which indicates the data that has been filtered on the pivot table.
<wcf:render ref="table01" xslUri="/WEB-INF/jpivot/table/mdxslicer.xsl" xslCache="false"/>
JPivot table with navigator and cube slicer:

